
Precisely Edit Images with Image Marking
Image Marking lets you point to specific areas in an image and guide the AI with visual cues. Learn how to use this feature step by step for more precise image edits.
Change only what you want—exactly where you want it.
When editing images with AI, you often run into this problem: "I only wanted to change one small thing, but the AI modified the whole image."
Image Marking solves this by letting you point directly to specific areas in your image and guide the AI with visual cues.
🌟 Pro Exclusive: This feature is only available in Nano Banana Pro.
Ready to experience precise, controlled image editing? Try it now and see the difference.
What Is Image Marking?
Image Marking allows you to add visual references directly on an image:
- Write text on the image (e.g., "bird", "car", "window")
- Draw marks to indicate specific areas
This helps the AI understand exactly what to change and where to change it—giving you precise control over your edits.
Example: Add a Bird at a Specific Location 🐦
In this example, we'll add a bird to a specific area of an image using Image Marking.
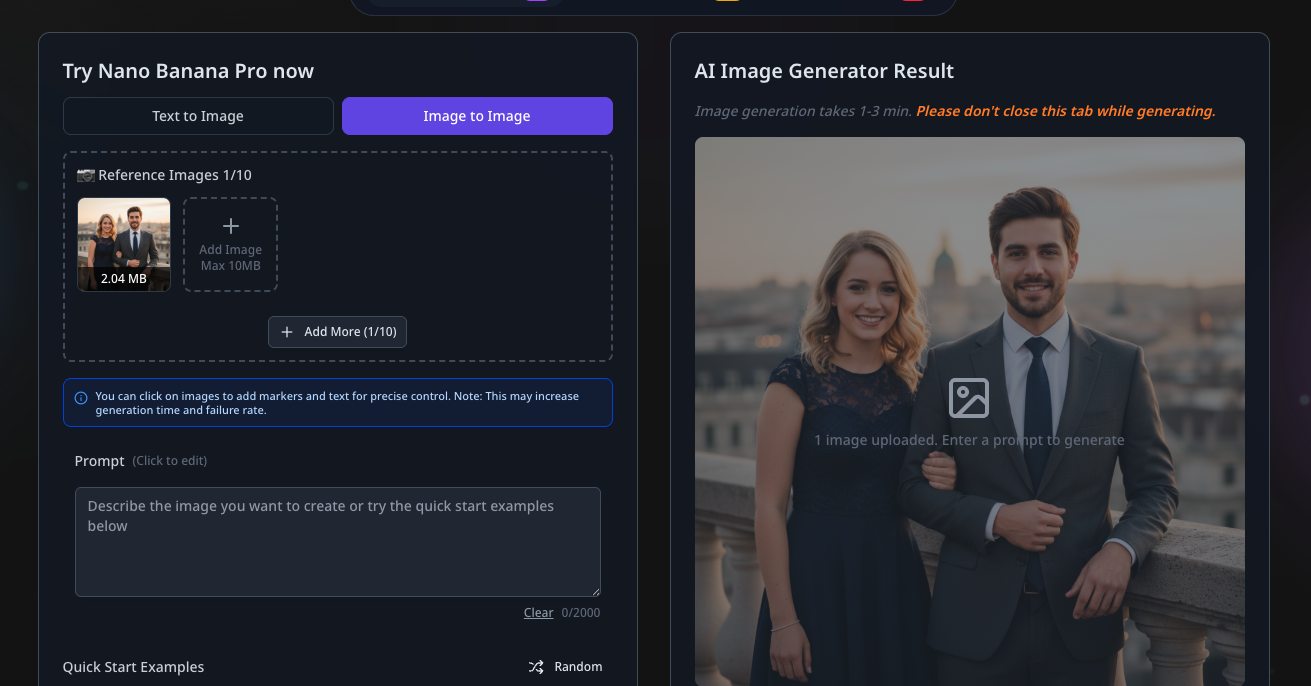
Step 1: Upload an Image
Switch to Image to Image mode and upload the image you want to edit.
This can be a portrait, a landscape, or any image where you want to make a localized change.
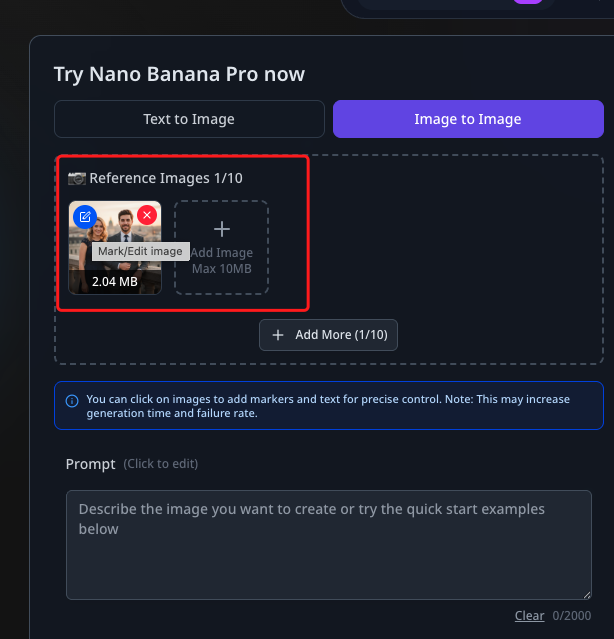
Step 2: Open the Image Editor
After uploading the image, click the Edit button on the image thumbnail to open the Image Marking panel.
Step 3: Mark "bird" on the Image
Inside the marking panel:
Go to the exact location where you want the bird to appear
Write the word bird, or mark the area using lines
Click "Done" to save the markings
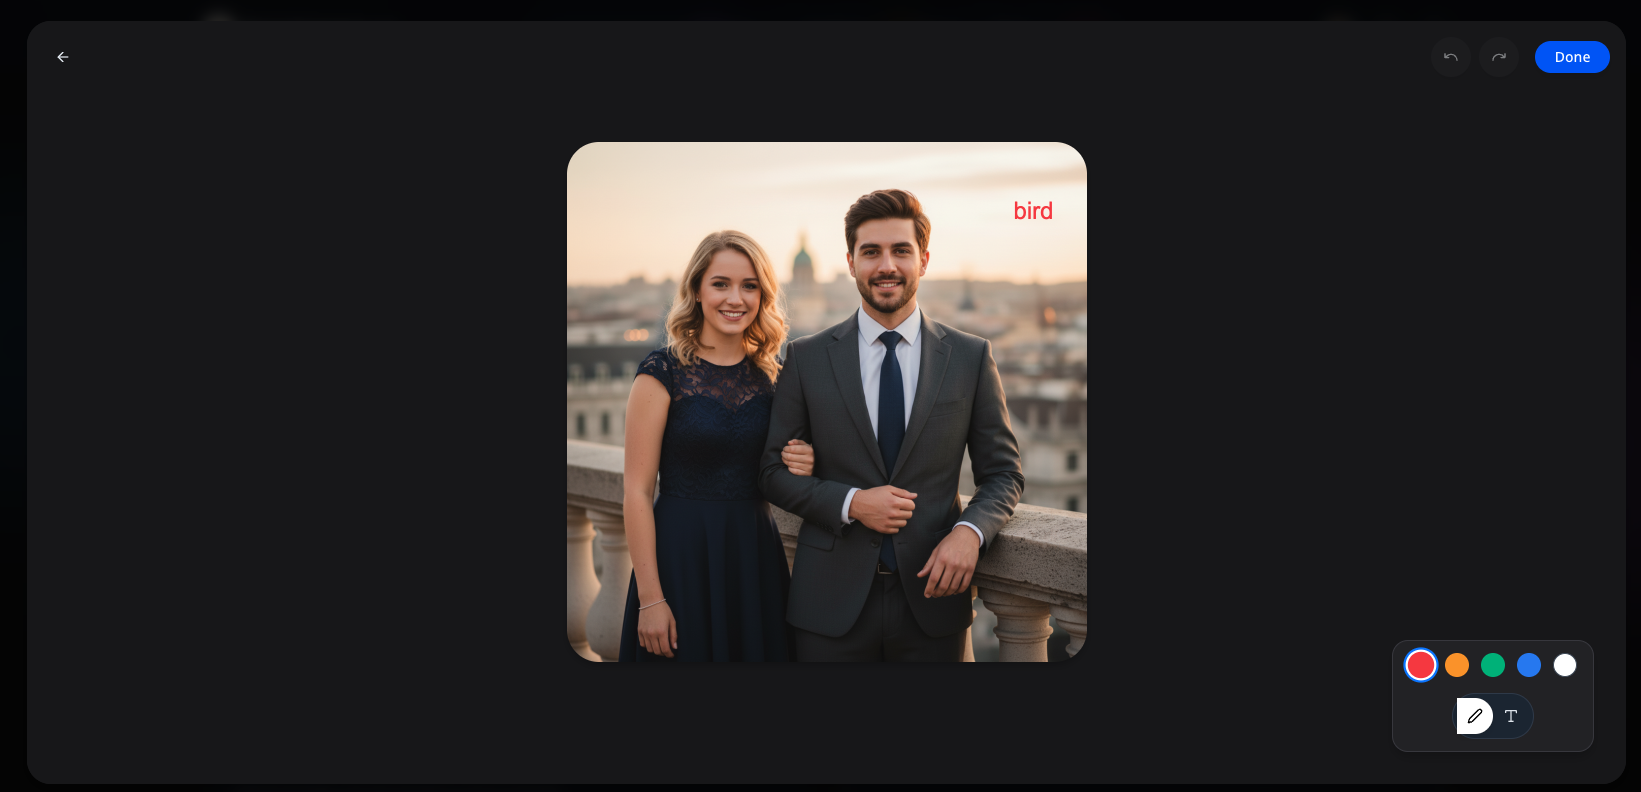
Pro Tip
Your marking doesn't need to be precise—clear positioning is enough.
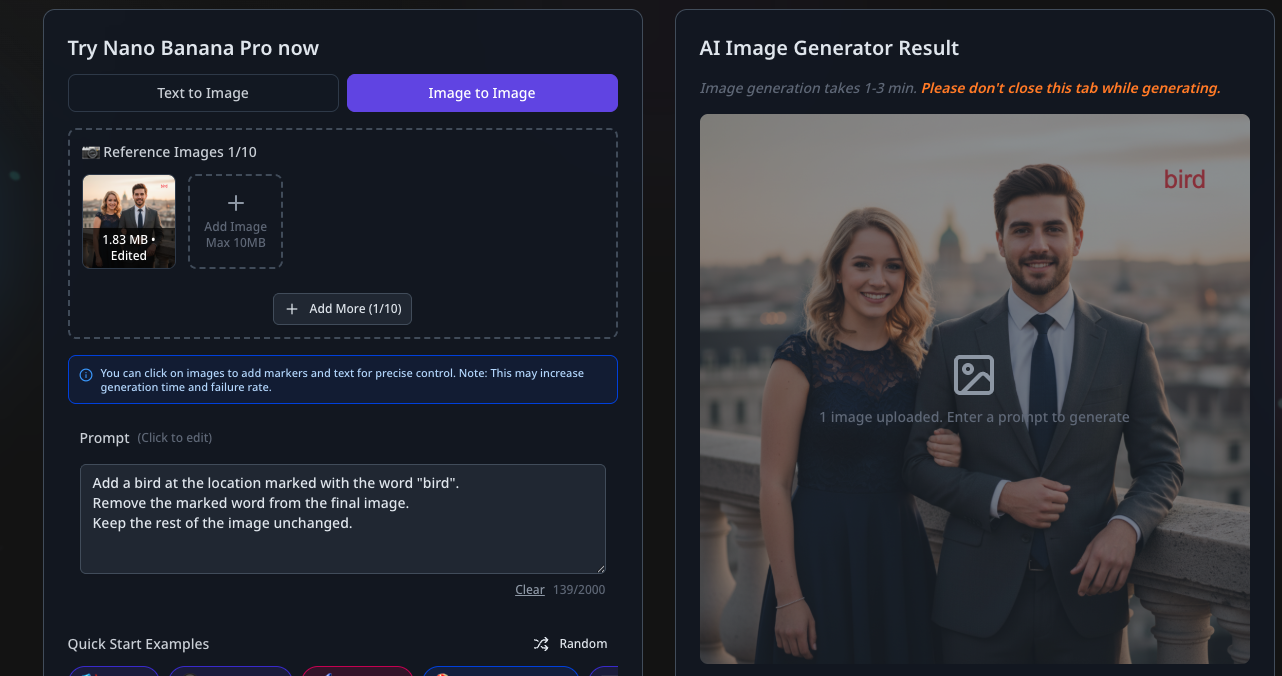
Step 4: Enter the Prompt
Back in the generator, enter the following prompt:
Add a bird at the location marked with the word "bird".
Remove the marked word from the final image.
Keep the rest of the image unchanged.
This tells the AI:
Add a bird
And use the marked "bird" location as the reference point
Step 5: Generate the Image
Click Generate and wait for the result.
You’ll see that:
A bird is added exactly near the marked area
The people, composition, and overall style remain unchanged

This is the power of Image Marking.
Why Use Image Marking?
Compared to text-only instructions, Image Marking offers several advantages:
✅ Precise Positioning
No need to explain “top-right corner” or “near the man’s shoulder.” Just mark the spot directly on the image.
✅ Less Random Changes
Edits are focused on the marked area instead of affecting the entire image.
✅ Ideal for Complex Images
For images with people, backgrounds, and multiple elements, Image Marking provides far better control.
Tips & Important Notes
To get the best results when using Image Marking:
Best Practices:
- ✅ Clear and simple markings usually lead to more stable outputs
- ✅ Use markings only when precise control is needed—avoid over-marking
Important
Because Image Marking provides additional spatial guidance, it may increase generation time and, in rare cases, increase the failure rate.
If the result isn't ideal, try:
- Simplifying the markings
- Rewriting the prompt more clearly
- Reducing the number of marked areas and regenerating
Overall, Image Marking works best for targeted, precise edits.
Final Thoughts
Image Marking upgrades AI image editing from "guessing your intent" to "following your instructions."
Image Marking is perfect when you need to:
- Add elements at exact locations
- Edit specific parts of an image
- Reduce trial and error
Image Marking makes Nano Banana Pro even more powerful, giving you unprecedented control over your AI image edits.
Ready to experience precise, controlled image editing? Try it now and see the difference.
More Posts

Nano Banana vs Seedream 4.0: A Practical Comparison Across Creative Scenarios
In-depth analysis comparing Nano Banana's advanced AI image transformation capabilities against Seedream 4.0, featuring real-world creative scenarios, performance benchmarks, and practical workflow comparisons


Behind the scences of google nano banana
Deep dive into Google's Gemini native image generation model capabilities, featuring insights from the development team on character consistency, interleaved generation, and advanced AI image editing

Nanobanana.co User Guide
Comprehensive guide to using Nanobanana.co's advanced AI image transformation platform. Learn how to create stunning visuals with text-driven prompts, master character consistency, and unlock the full potential of Google's nano-banana model